Handlebars + Express JS + Node JS
Today I’m going to show you how to create an ultra simple Express JS server application and use the Handlebars framework to handle “modularization”. To follow along, please make sure you have Node and NPM configured on your machine. If you don’t have the required applications, read my Setup Node JS and NPM Tutorial. The following Handlebars tutorial will introduce you to Handlebars (for templating), and ExpressJS (for serving content). By the end of this tutorial you should have an basic understanding on how to create an application/website using Handlebars, Express JS & Node JS (HEN?) stack.
What is Express JS?

Express is a minimal and flexible Node.js web application framework that provides a robust set of features for web and mobile applications. — ExpressJS.com
As stated, Express JS is minimal and flexible framework for Node JS. Meaning, although Express is very robust and has lots of features and frameworks, you do not have to include it ALL in your website. You can just use parts or modules that you need. You can also use “Express-generator” as a scaffolding utility — this will setup the entire file/folder structure to match that of a default Express app, although we will not be using that functionality in this tutorial.
Create Express JS Server
First, to start creating an Express app, create a project directory. Create a folder named expressSite and navigate to it using the terminal or Windows command line. This will be our project directory for our handlebars tutorial.
root@kali:~/Public/Web Projects/expressSite#
From inside the project folder, run npm init. NPM will guide you through setting up your project by asking a series of questions. You can use the default values (just keep hitting [Enter]). This will create a package.json file in your project folder.
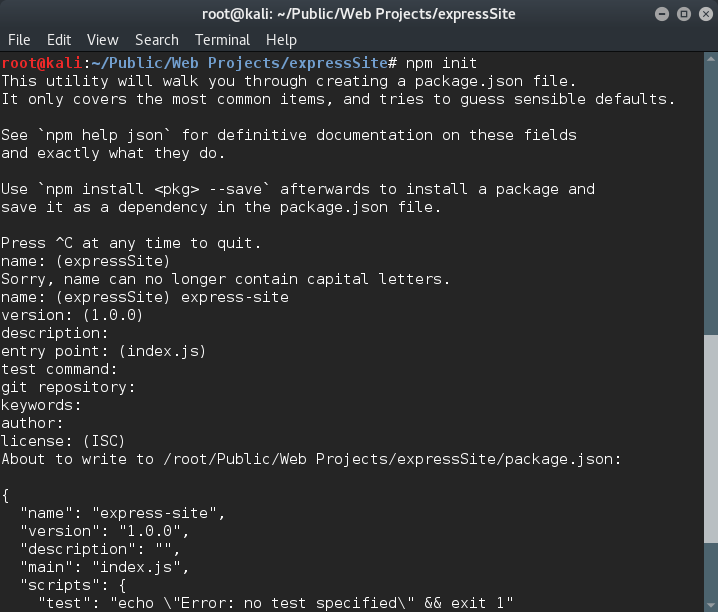
Kali Terminal – npm init
Additional Info – Handlebars Tutorial
I had to rename my project to express-site because, as you can see in the image above, “the project name can no longer contain capital letters.” If you are following along, it isn’t necessary to rename the actual project directory. We can leave the project directory named expressSite.
Likewise, create an index.js file in your project directory. Open index.js file and type (or copy and paste) the following:
//TechSide basic express server example

var express = require('express');
var app = express();

app.set('port', process.env.PORT || 3000);

app.use(function(req,res){
	res.type('text/plain');
	res.status(404);
	res.send('404 - not found');
});

app.listen(app.get('port'), function(){
	console.log( 'Express Server Started on http://localhost:3000');
});
Additional Info – Handlebars Tutorial
app.use is an Express JS method that Express uses to add middleware. In the above code, app.use is “catching” anything that does not match a specified route. To learn more Express JS methods and functions, visit ExpressJs.com
Now, if you navigate with your browser to http://localhost:3000. You should get served the ‘404 – not found’ message. This is because we have not created any routes yet.
Let’s create Routes, just as we did previously with the Node JS server example.
Above the first app.use method, type the following:
app.get('/', function(req,res){
	res.type('text/plain');
	res.send('Main Page')
});
Important Info – Handlebars Tutorial
Routes should be placed above any app.use method. That being said, it is very important to have your routes and methods in the correct order when using Express JS, otherwise your application/website will not function correctly.
If you restart the Express JS server (node index.js), and navigate to http://localhost:3000 with your browser, you should now get the response “Main Page”. If you type a URL that we have not defined (http://localhost:3000/about) then you should get the “404 error” response. We are not actually displaying different pages, just sending different data via Express JS routing methods, and creating “views” (more on views later).
Additional Info
To stop the server, in the Linux terminal, or Windows Command Prompt, press CTRL+C. To restart type node index.js. You should only have to restart the server if you made any changes to the index.js file. Changing code in other files should not require a restart. There is also a npm module called nodemon which takes care of restarting the server automatically if any file changes are noted.
As of yet, the Express JS server we created is a lot like the Node JS server example we created. There are still minor differences between the two servers, but since this is a simple example, the differences aren’t as easily noticed (yet). Express routing takes care of a lot of the work for us, such as splitting the query strings in the URL, and converting the lowercase. You will definitely notice the difference as your website or application grows.
Modularization with Handlebars

Although Express JS prefers using Jade view engine out of the box, we will use Handlebars because it allows you use HTML markup instead. To include Handlebars in our Project, open Terminal or Windows command prompt and type:
root@kali:~/Public/Web Projects/expressSite# npm install express-handlebars --save
Info: --save flag adds the dependency to your package.json file automatically.
The above command will install Handlebars and include it in your project’s node_modules directory. We are now ready to use Handlebars.
Next, inside your main project directory (expressSite/), create folder named views, and inside that folder create a folder named layouts. Finally, create a file named main.handlebars and type the following code:
<!DOCTYPE html>
<html>
<head>
	<title>My Express Site</title>
</head>
<body>
	{{{body}}}
</body>
</html>
This creates a Handlebars “template”. Everything is HTML code besides {{{body}}}.
Now it’s time to create a view for our homepage. In the expressSite/views/ directory create file named home.handlebars. Open home.handlebars and type the following code:
<h2>Welcome Home</h2>
<p>This is my Express Site that uses handlebars</p>
Save the code. In addition, let’s create our 404 view. In the views folder, create another file named 404.handlebars and type the following code:
<h2>404 Error</h2>
<p>Page not found.  Please check the URL.</p>
Save the file. Now that we have the views setup, it is time to update our index.js file router to point the user to the correct view. Replace the Express JS app.get method and app.use method in index.js to the following:
app.get('/', function(req,res){
	res.render('home');
});

app.use(function(req,res){
	res.status(404);
	res.render('404');
});
Here is the complete code for our final index.js file just in case you need it.
//TechSide Express JS Server with Handlebars Tutorial

var express = require('express');
var app = express();  //use express js module

//add handlebars view engine
var handlebars = require('express3-handlebars')
	.create({defaultLayout: 'main'});  //default handlebars layout page

app.engine('handlebars', handlebars.engine);
app.set('view engine', 'handlebars'); //sets express view engine to handlebars


app.set('port', process.env.PORT || 3000);  //sets port 3000

app.get('/', function(req,res){
	res.render('home');  //respond with homepage
});

app.use(function(req,res){  //express catch middleware if page doesn't exist
	res.status(404);  //respond with status code
	res.render('404'); //respond with 404 page
});

app.listen(app.get('port'), function(){ //start express server
	console.log( 'Express Server Started on http://localhost:3000');

});
We no longer don’t have to set “content-type” or “status code” for app.get as we did previously because our Handlebars view engine is taking care of all of that automatically. Although for app.get method we do not need to set status, for the method (app.use) we DO have to set the status code (res.status(404)).
Here is the current directory structure for our project if you need it for reference:
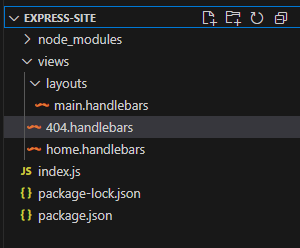
Express/Handlebars tutorial directory structure
Let’s test our site. First, restart your server, you should be served the home.handlebars content when you visit http://localhost:3000/ and 404.handlebars content when you visit http://localhost:3000/404 or any other route that does not exit (http://localhost:3000/abc). Our handlebars “template/layout” file (main.handlebars) will stay the same, but when the user changes the route, new content is “injected” into the {{{body}}} of the main layout file.
This can also be called a “View”. If you’re unfamiliar with MVC (Model-View-Controller), I recommend reading up on it as it will make understanding the concept a little easier. Here is an simple diagram I found that describes the MVC:

A view can be any output representation of information, such as a chart or a diagram. Multiple views of the same information are possible, such as a bar chart for management and a tabular view for accountants. — wikipedia.com
Below, I have copied and pasted pictures of each View. As you can see, our webapp basically creates a blank HTML template, then inserts the data into the
section of the HTML. Each one is a different view — it is basically the final rendering of each of the pages on our app.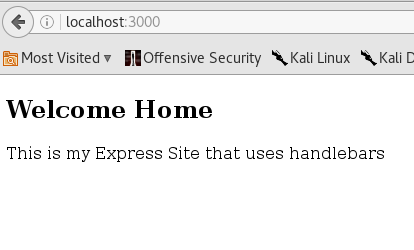
Home View
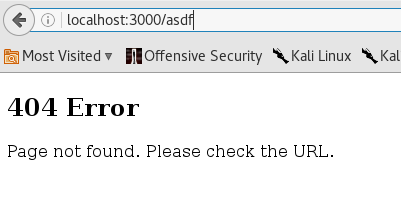
404 Error View
This is an ultra simple example of how to “modularize” your website or application. While it seems like a lot of work just to show 2 basic simple Views, imagine the possibilities of modularization when your website grows. After all, we do want more users for our website/web app, right?
Add Static Files to Express JS Server
Static files, or files that do not change (such as images, other JS, or CSS files, etc.) can also be served to the client with Express JS. To do this, create a directory called public in your main project directory. The public directory will hold all our static files. To serve static files, we simply add the following line to our index.js file above our defined routes:
app.use(express.static(__dirname + '/public'));
Info: In the above code static is another Express JS middleware. __dirname returns the main directory and “/public” folder is appended to the end to create the complete path for our static pages directory.
Now that we have the static directory setup, I’m going to add a custom style.css file (/public/images/style.css) and a logo.png file (/public/css/logo.png) to our project’s public directory. For the logo, go ahead and download any .png logo file from Google Image Search, or use your own.
Here is my current and final folder structure for our Express JS, Handlebars Website:
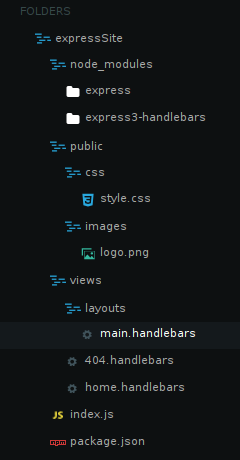
Final folder structure
For style.css, you can also create your own, but here is the code for the basic style.css I created for demonstration purposes:
/*Techside Example CSS Static file for Express and Handlebars*/
body {
	text-align:center;
}
body img{
	width:200px;
	background-color:#ccc;
	box-shadow: 2px 2px 2px #555;
}
body h2{
	font-family: verdana, tahoma;
	text-align:center;
	text-shadow: -2px 2px 0px #666,
                 -4px 4px 0px #ccc,
                 -6px 6px 2px #333;
}
We also need to edit our main.handlebars file to include our static files. Here is my updated code:
<!DOCTYPE html>
<html>
<head>
	<link href="/css/style.css" rel="stylesheet">
	<title>My Express Site</title>
</head>
<body>
	<img src="/images/logo.png" />
	{{{body}}}
</body>
</html>
As you can see, in the main.handlebars file, I included the code for the logo.png image file and inserted the <link> for our style.css file.
Info: If you look at the directory structure code in the main.handlebars, we did not have to include the “public” folder in the path for any of the static files. It is not necessary.
Finally open your browser and navigate to http://localhost:3000/, and if everything was done correctly, you should see the logo image and stylesheet has been applied to our page:
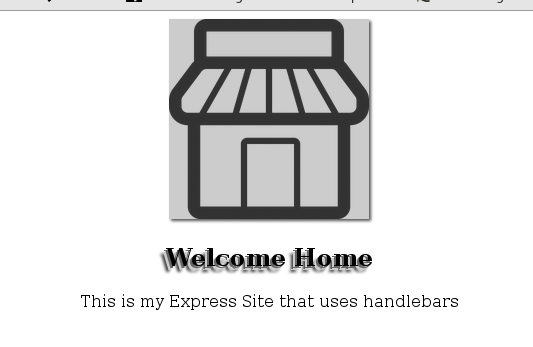
Home with static files (http://localhost:3000/)
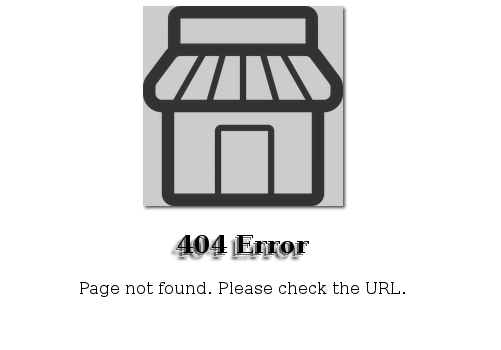
404 with static files (http://localhost:3000/asdf)
Summary – Handlebars Tutorial
In conclusion, for our Handlebars tutorial we have created an ultra basic website/application using Handlebars, Express JS, and Node (HEN). We used NPM (Node Package Manager) to add Express JS and Handlebars to our project. Initially we created our Express JS server and served text to the user. Then we transformed our Express JS server to serve actual webpages by “modularizing” our content and using Handlebars to “inject” it into our ‘main’ template to create Views.
Finally, we learned how to serve static files (images, css) with Express JS, to modify the design/look of our website. I recommend reading up on Model-View-Controller to understand the concept further. Although this was a really basic example of using Express, it lays the foundation of creating a great, full-featured website that will be easier to maintain as it grows (scalability).

0 Comments